
As a small business owner, understanding the intricacies of job costing and how to effectively manage and bill customer job costs is crucial for maintaining profitability. QuickBooks Online offers powerful features that allow you to track billable expenses accurately, ensuring that you recover all costs associated with a customer job while applying appropriate markups. In this guide, we’ll explore how to use QuickBooks Online billable expenses to streamline your job costing process and improve your bottom line.
Enabling Billable Expenses in Company Settings
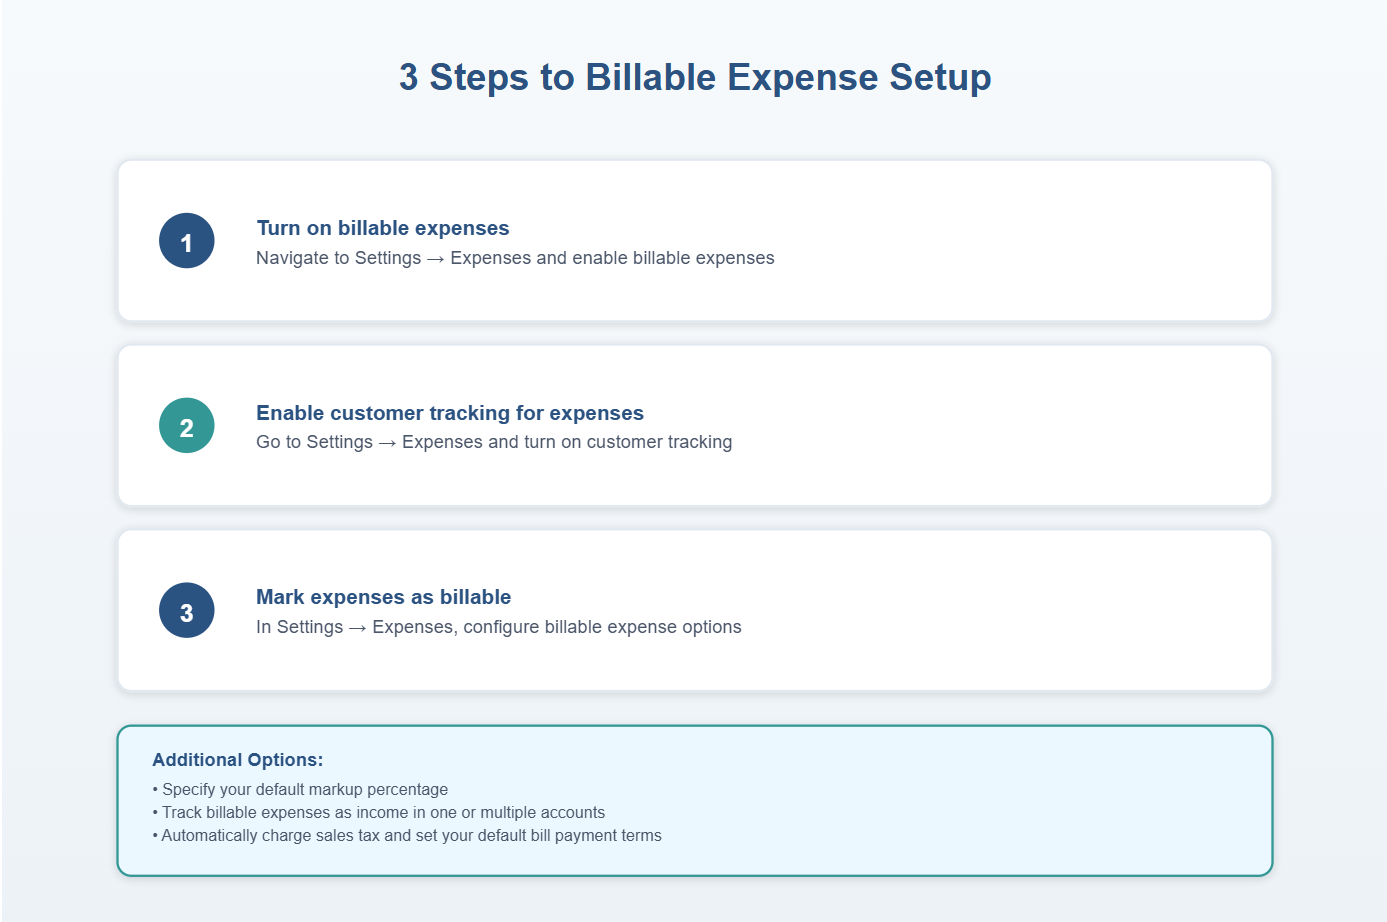
Before you can start tracking billable expenses, you need to enable this feature in QuickBooks Online. Here’s how:
- Navigate to Account and Settings:
- Click on the Gear Icon in the upper right corner of QuickBooks Online.
- Select Account and Settings from the dropdown menu.
- Enable Billable Expenses:
- Go to the Expenses tab on the left-hand side.
- In the Bills and Expenses section, check the boxes for:
- Track expenses and items by customer
- Make expenses and items billable
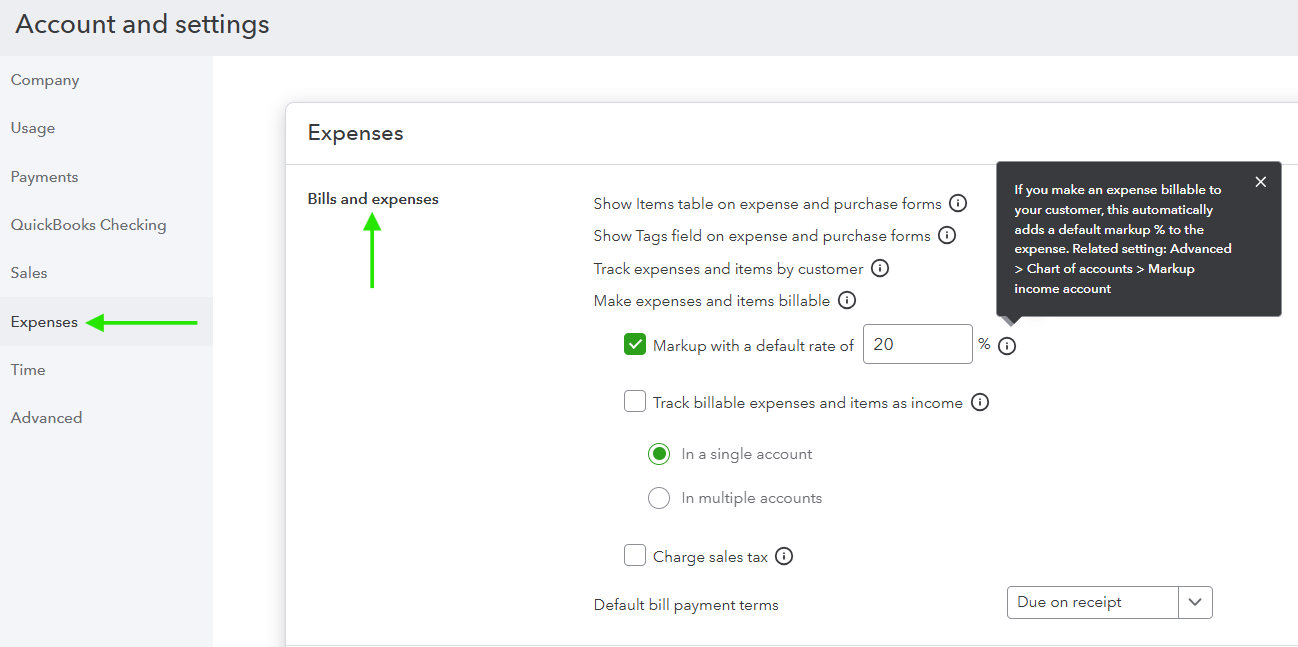
By enabling these settings, you can start assigning expenses to specific customers or jobs and mark them as billable.
Record as a Bill, Check, or Expense
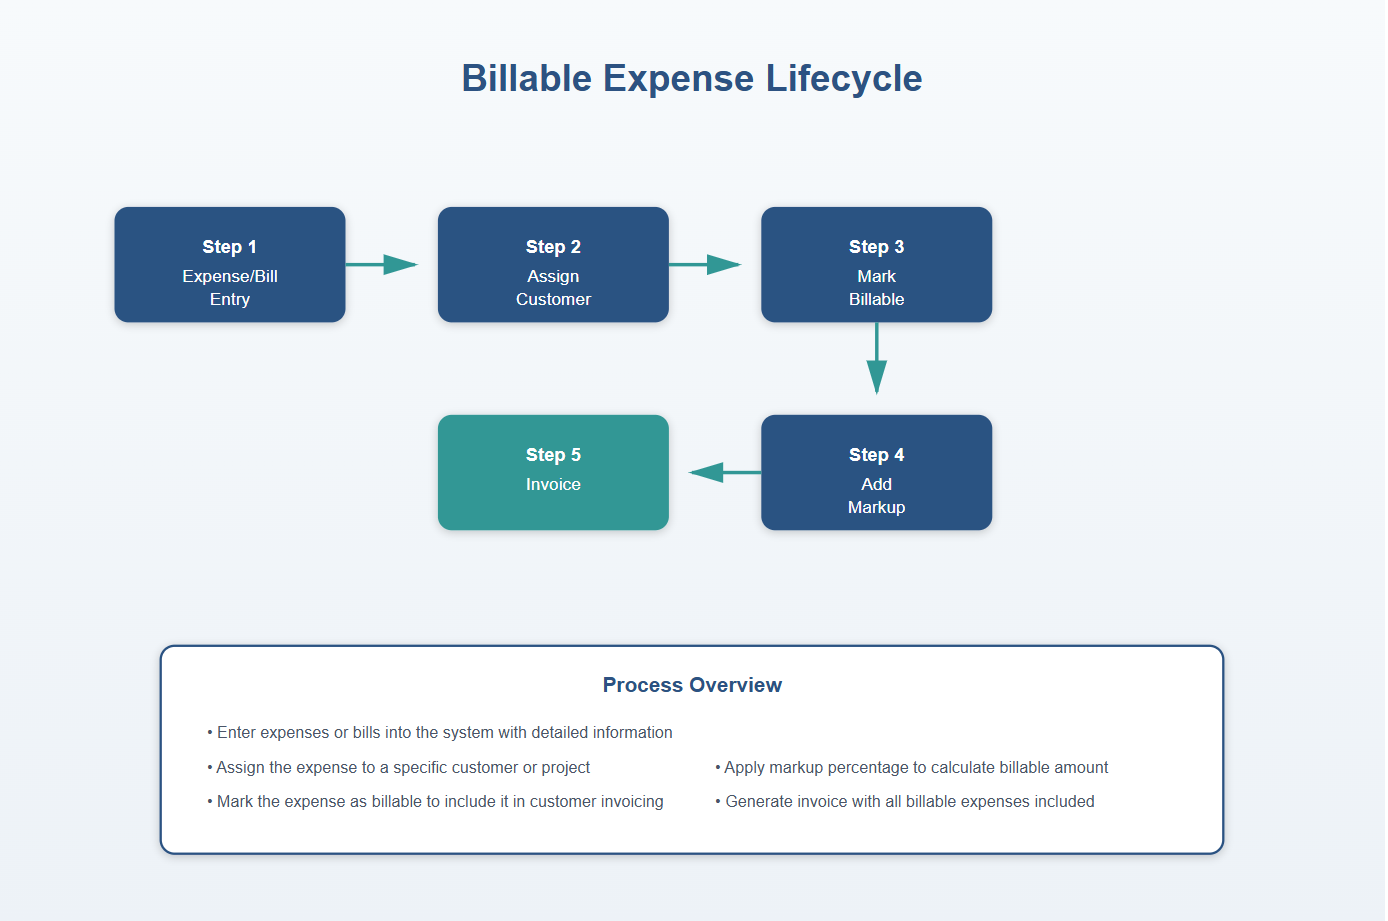
Once billable expenses are enabled, you can record transactions associated with a customer job:
- Enter Each Item Line Separately:
- When recording a bill, check, or expense, ensure each billable item is entered on its own line. You don’t want to add the customer or markup to non-billable items. Note that you can add a markup on an Item or a Category type expense.
- Assign to the Correct Customer:
- Use the Customer/Project field to assign the expense to the appropriate customer or sub-customer (job).
- Mark as Billable and Apply Markup:
- Check the Billable box for each line item.
- Enter a markup percentage or dollar amount if applicable.
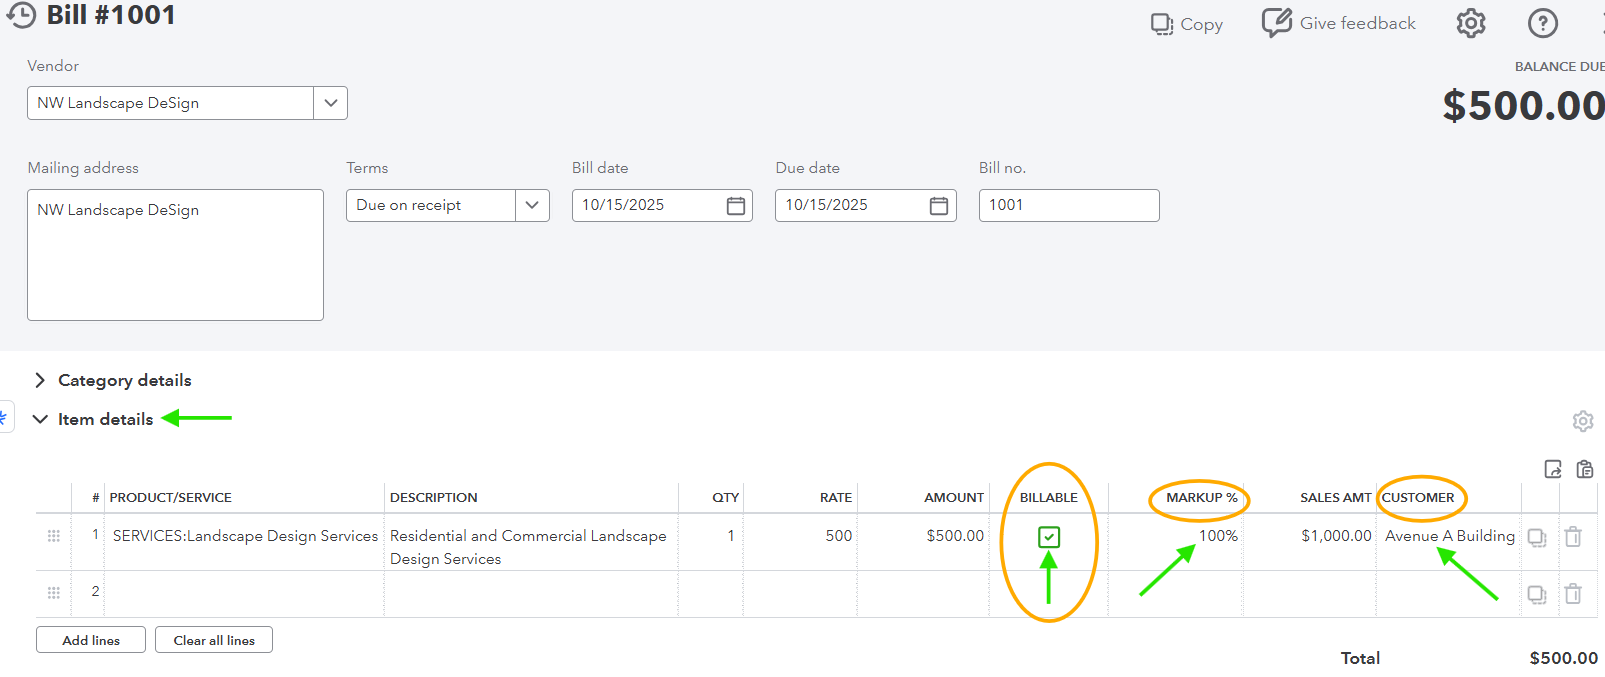
This approach allows you to precisely track costs and apply markups for recovery when invoicing your customer.
Separating Operations vs Retailing Costs with Classes
Using class tracking in QuickBooks Online provides deeper insights into your business operations:
- Set Up Class Tracking:
- Navigate to the Advanced tab in Account and Settings.
- Enable Track classes and define your classes, e.g., Operations and Retailing.
- Assign Classes to Transactions:
- For example, categorize tools, office supplies, and fuel as Operations.
- Label materials and subcontractor costs as Retailing.
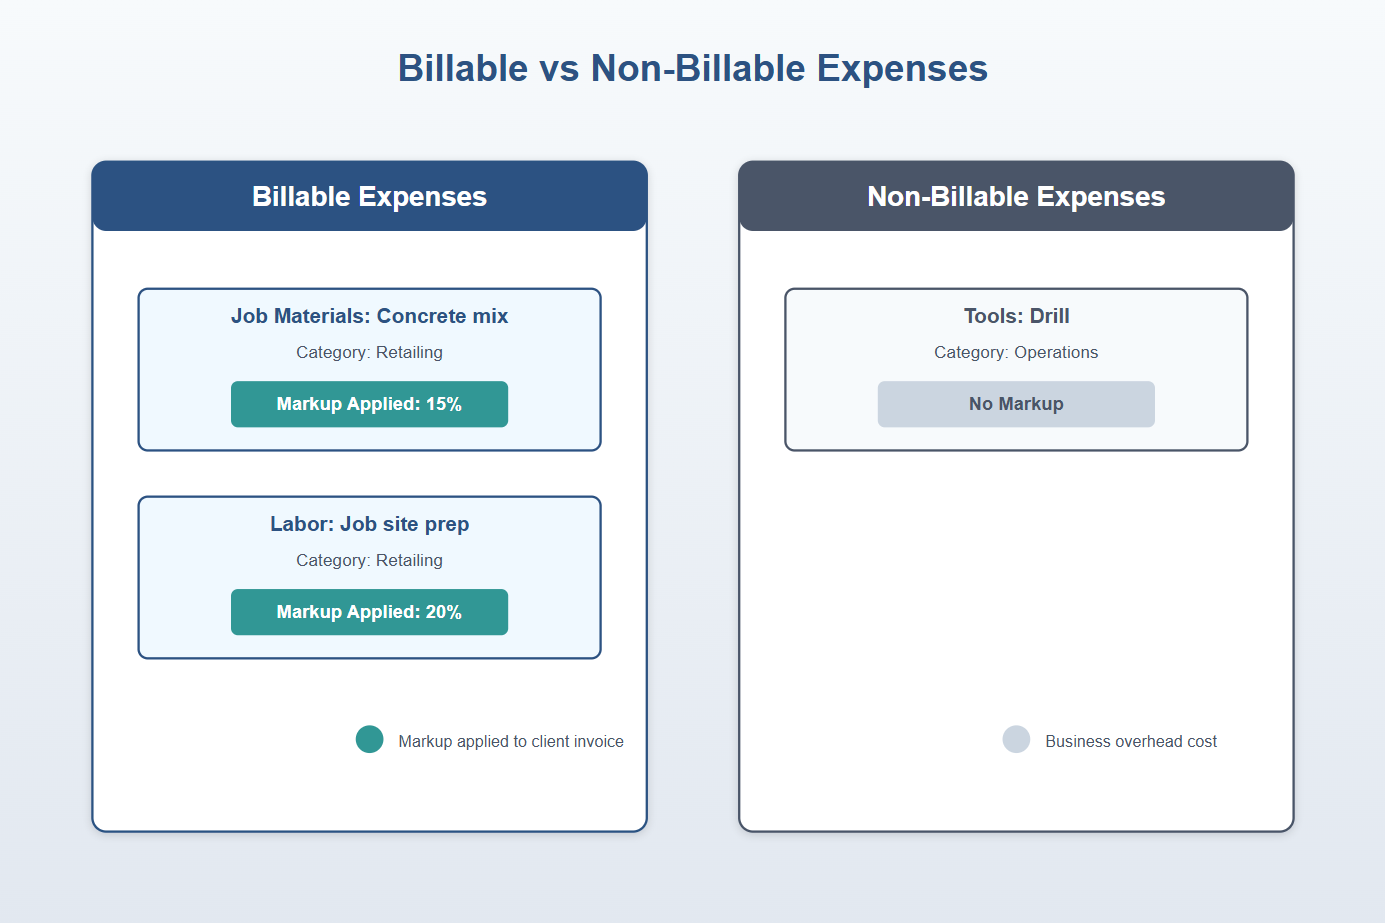
This separation helps in generating reports that show the financial health of different segments of your business.
Marking Billable Expenses as Taxable When Applicable
In some states, both labor and materials might be subject to sales tax:
- Mark Billable Line Items as Taxable:
- Ensure that you check the Taxable box for applicable line items when recording expenses.
Properly marking items as taxable ensures that sales tax is calculated correctly on customer invoices.
Creating Customer Invoices from Billable Expenses
QuickBooks Online allows you to effortlessly convert billable expenses into customer invoices:
- Add Unbilled Items to Invoices:
- When creating an invoice, QuickBooks Online lets you add all unbilled items with a single click.
- Adjust Markup or Description:
- Review each line item on the invoice, adjust the markup or description as necessary before sending it to the customer.
QuickBooks Online links expenses to invoices, providing full audit visibility.

Create Invoice with Billable Expense in Customer Transaction List
Reporting on Unbilled Charges and Job Profitability
Tracking your business’s financial performance is vital:
- Generate Reports:
- Use the Unbilled Charges report to identify expenses not yet invoiced.
- Utilize the Profit & Loss by Customer report to assess job profitability.
- Drill Down to Source Transactions:
- Click on line items within reports to view underlying transactions for detailed analysis.
These reports help you ensure that all costs are billed and provide insights into your profitability per customer or job.
ProAdvisor Tips for Billable Expense Accuracy
To enhance the accuracy of your job costing:
- Assign Classes and Customers to Every Billable Expense:
- Ensure each expense is associated with the correct customer and class.
- Set Default Markup Percentages:
- Consistently apply markups by setting default percentages based on vendor type.
- Regularly Review Unbilled Charges:
- Cross-check the Unbilled Charges report monthly to avoid missed billing opportunities.
Common Mistakes to Avoid with Billable Expenses
Avoid these pitfalls to ensure flawless billing:
- Forgetting to Assign a Customer:
- Without a customer assignment, expenses won’t appear in the unbilled list.
- Marking Internal Use Expenses as Billable:
- Ensure only customer-related expenses are marked as billable.
- Incorrectly Applying Sales Tax:
- Confirm that sales tax is applied correctly, especially on labor if required.
By adhering to these guidelines, you can utilize QuickBooks Online billable expenses to their fullest potential, ensuring accurate job costing and efficient invoicing. This not only prevents missed reimbursements but also gives you a clear picture of your project margins — equipping you with the insights needed for smarter financial decisions and business growth.
QuickBooks Resources
Make expenses billable in QuickBooks Online
Free Downloadable Resources
Checklist for Accurate Tracking and Recording of Billable Expenses

Your Personal Guide to Seamless Accounting: Advanced QuickBooks ProAdvisor at Your Service
Hey there! I’m Gina, and I’m the proud co-founder of Lend A Hand Accounting. Why did I start this? Well, I believe that everyone should have access to affordable, efficient, and flexible accounting and bookkeeping services. It’s all about making sure these essential services fit snugly into your budget without any fuss.
We’ve ditched the traditional hourly rate system and adopted a flat fee pricing. You might be wondering, “Why does this matter?” Well, this way, you know exactly what you’re paying for upfront and there are no unexpected surprises. You get to pick and choose the accounting services you need, like a customized menu. And the best part? You’re in complete control of when you start or stop using our services. We’re essentially just a call or a text away, no need for endless phone calls or draining trips to the accountant’s office.
I’m not just any accountant though. I’m an Advanced QuickBooks Online ProAdvisor. That means I’m equipped with advanced expertise and resources to help you leverage QuickBooks Online to its full potential. My goal is to make your accounting process smooth and efficient so you can focus on what you do best – running your business.
Ready to get started? Reach out to me directly at 360-637-4799. We can even kick things off immediately if you’re ready. Simply create a free account, and I can instantly take a look at your books and let you know where you stand.
At the end of the day, we’re here to serve you. We really appreciate the trust you place in us and we’re eager to meet all of your accounting and bookkeeping needs. Looking forward to being part of your team!
Take care,
Gina
The Content is for informational purposes only, you should not construe any such information or other material as legal, tax, investment, financial, or other advice.